VirtualBox has a nasty little habit of suggesting small virtual Hard disk sizes when creating Virtual Machines. I created an Ubuntu image to play around with docker and the default size allocated was 20GB. Within a couple of days, I realized that 20GB is not going to cut it, as the docker images I was downloading were all a few GB’s and I was running out of disk space. I needed to extend the the disk size. When I searched for help, there were some pointers, but nothing that provided me a step by step direction. Anyway, I got it done and decided to write this blog post so others can benefit as well.
VirtualBox images are stored in vmdk files. So, the first google search I did was for “How to resize a virtual box vmdk file” which led me directly to the below stackoverflow post.
https://stackoverflow.com/questions/11659005/how-to-resize-a-virtualbox-vmdk-file
This above post is suggesting us to use 2 commands to get this done:
|
1 2 3 4 5 6 |
vboxmanage clonehd "virtualdisk.vmdk" "new-virtualdisk.vdi" --format vdi vboxmanage modifyhd "new-virtualdisk.vdi" --resize 30720 |
Wish it was that easy. I opened a command prompt and typed vboxmanage, windows does not know of vboxmanage. Obviously, the exe was not in windows path and I needed to locate the file. When I found out were vboxmanage was located and invoked it – I noticed that the version I was using did not support a clonehd or a modifyhd command as indicated in stackoverflow. Below are the steps I took to get this done:
From your Oracle VM VirtualBox, choose the image you want to extend the disk size for. Then choose Global Tools as shown in screenshot below:

In the next screen choose the image you wish to clone and click copy as indicated in below screenshot:

In the copy dialog that opens, choose the options as shown below:

It is important you choose the Disk image file type as “VDI VirtualBox Disk Image” and the “Storage on physical hard disk” as “Dynamically allocated”. Both as shown in above screenshot.
After choosing the options, click copy. The vmdk base image will be cloned to a VDI file. The process takes about 5 to 10 minutes depending on your disk size and speed of hardware.
Once the VDI file is created, we need to run the vboxmanage modifymedium command. To find out the location of vboxmanage, I looked up the shortcut for Oracle VM VirtualBox which was installed in “C:\Program Files\Oracle\VirtualBox” for me. I opened this location in explorer and looked for vboxmanage.exe and found it right there.
Next step, I opened a command prompt and navigated to “C:\Program Files\Oracle\VirtualBox” location. Then I ran the modifymedium command to increase allocation to 40GB, shown below is the output:
C:\Program Files\Oracle\VirtualBox>vboxmanage modifymedium disk C:\Users\veda\.docker\machine\machines\default\disk_copy.vdi –resize 40960
0%…10%…20%…30%…40%…50%…60%…70%…80%…90%…100%

And there it was successful resizing the cloned image to 40GB. Below is the command if you want to copy and change as you wish:
|
1 2 3 4 5 |
vboxmanage modifymedium disk C:\Users\veda\.docker\machine\machines\default\disk_copy.vdi --resize 40960 |
Now, we need to load it into virtualbox and see if it works. In order to do this, click on New in Oracle VirtualBox as shown below:

In the next screen, choose memory size as needed. This can be changed at anytime unlike hard disk space, so don’t really care what we provide here. Click next.
In the following screen, you have to choose the resized .vdi file you cloned previously.
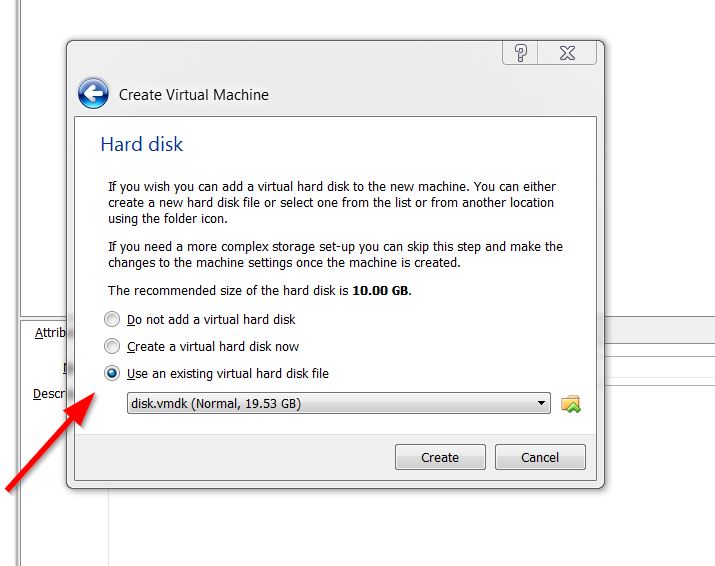
The vm that gets created as a result will use the vdi file and have the extra space available. Of course, you have to boot into the image and resize the Disk within the OS itself. I am not going to cover that in this post, will post a separate one for how I got this done in Ubuntu. Booting into the guest OS and resizing drive partitions vary for various OS’s and deserves a post of its own.