So, I got setup with a NAS storage device at home. Since I do a ton of development during my spare time, I wanted to setup a version control system that I can use to store my work. This would serve as a personal repository that I can go to if I wanted to check out one of my older versions or commits. It is all about being in control, and having my own versioning system in my own NAS gives me complete control. When it comes to version control, there are a few options from Git, SVN, Clearcase and CVS. Which versioning is better is a personal taste thing and I am not going to debate that in this blog. My choice was git, although I like SVN as well. Today, I am going to talk about setting up Git server on Asustor NAS. The process is similar for other NAS devices and SVN. I will post another blog for SVN if there is sufficient demand. Send your request through comments and I will investigate and post a new blog on SVN. But for now, we are back to setting up Git on Asustor.
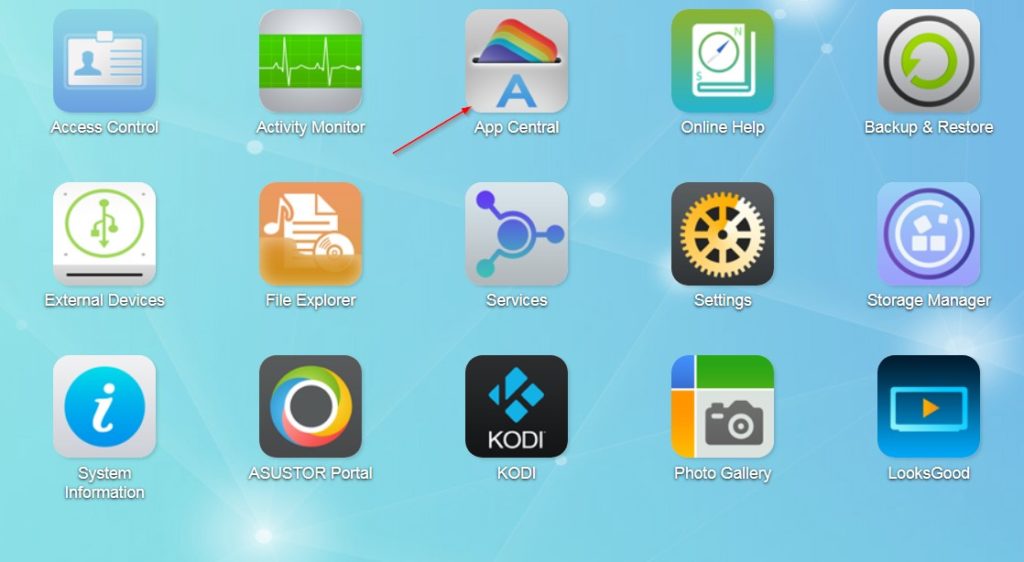
Asustor NAS has Git application available through the ADM (Asustor Data Master) the admin UI for Asustor NAS. There is a similar admin UI for other NAS devices as well. Your first step is to check if the NAS provides Git as an available application and install it if it is available. In Asustor ADM in order to do this, click on App Central:
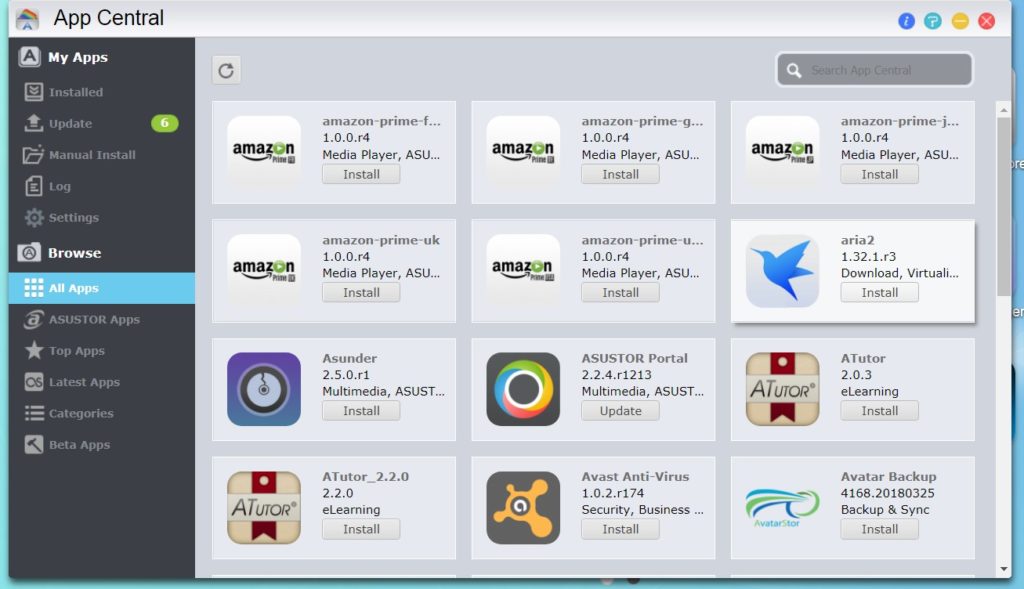
Go to all apps and search for Git:
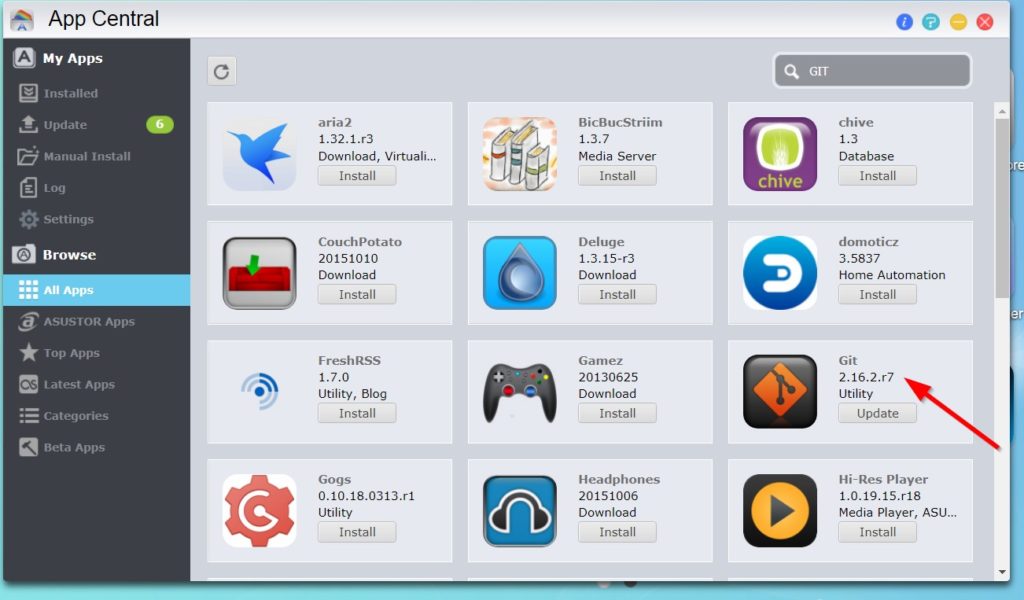
Click Install button below Git to install.
At this point, your NAS has Git application available. But you are far from done. There are a couple of restrictions that you should be aware of. The Git application provided in the Asustor NAS works only with SSH and you can only use root/admin account with Git. In order to complete the setup, you need to logon to the NAS server and configure Git using SSH
How to ssh into ASUSTOR NAS?
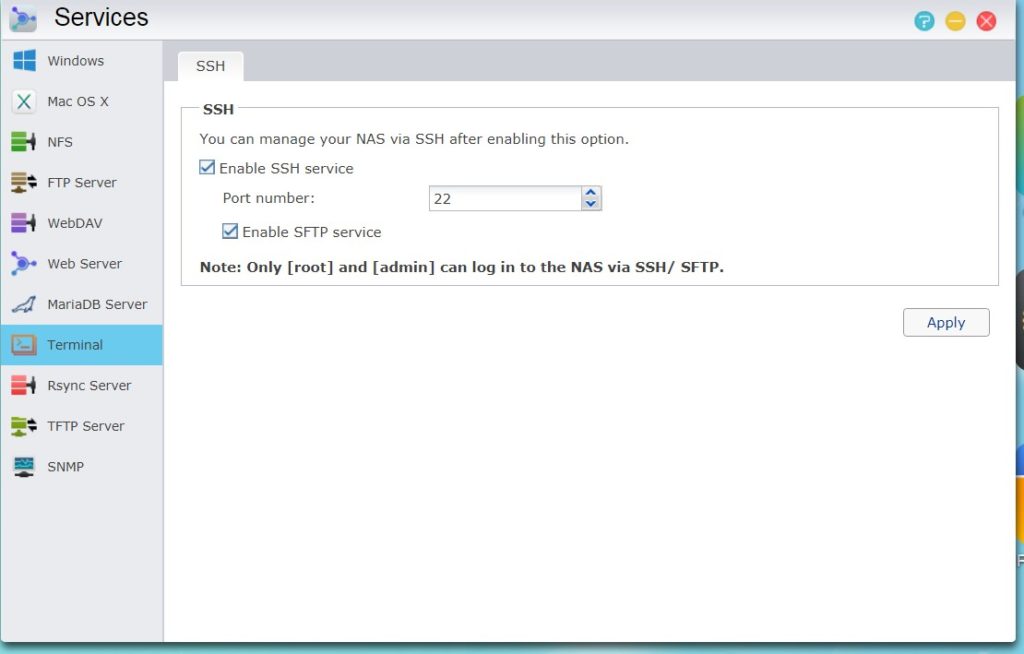
In order to SSH into the NAS, you have to get turn on terminal access to NAS OS. Asustor NAS runs on a GNU Linux and has terminal access option available. To turn on terminal access, follow below directions:
- Enable SSH on the NAS.
Login to ADM (admin UI for NAS) -> Services -> Terminal -> SSH -> Enable SSH service.
- Download PuTTY which is a free implementation of Telnet and SSH for Windows and Unix platforms, along with an xterm terminal emulator. You can get it from http://www.chiark.greenend.org.uk/~sgtatham/putty/download.html
- Open Putty SSH and then type in your NAS IP address.
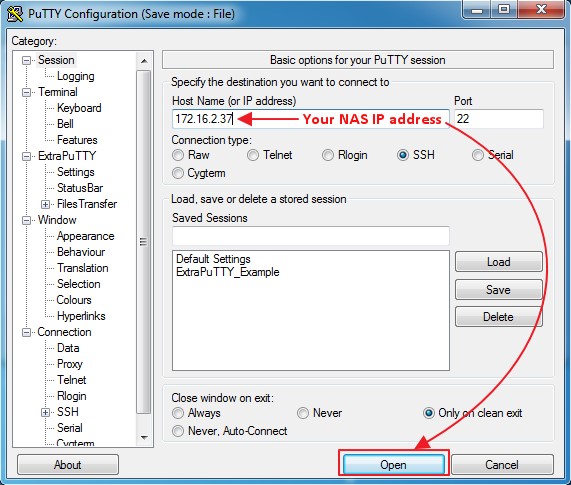
- Login as “root” and the SSH password for root is same as your “admin” account’s password.
(Please note that only root account is allowed to ssh into NAS.)
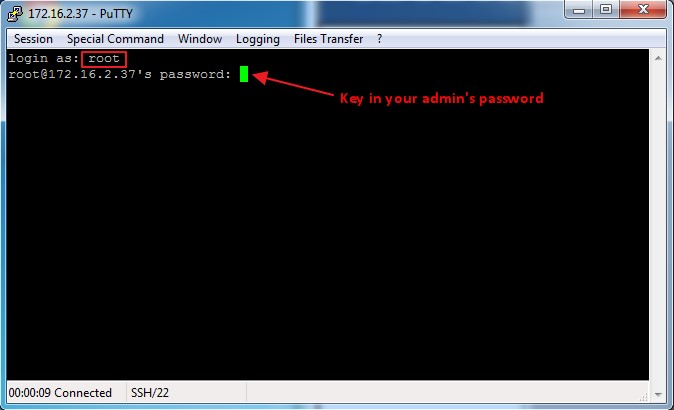
Now that we are in, let us go ahead and complete the repository setup:
Choose a location of your choice, create a git folder. This will be the root folder under which all the git projects are going to reside.
Below is my example location:
|
1 2 3 4 5 6 |
root@sureshnas:/ # cd share/Public/ root@sureshnas:/share/Public # mkdir git |
cd into this new folder:
|
1 2 3 4 5 |
root@sureshnas:/share/Public # cd git |
Move the project folder/contents into this folder
|
1 2 3 4 5 |
root@sureshnas:/share/Public/git # mv ../webstore-client . |
Now create a webstore-client.git folder
|
1 2 3 4 5 |
root@sureshnas:/share/Public/git # mkdir webstore-client.git |
Cd into this folder and create a bare repository. This is an empty repository or a placeholder for the new project you are going to create:
|
1 2 3 4 5 6 |
root@sureshnas:/share/Public/git # cd webstore-client.git/ root@sureshnas:/share/Public/git/webstore-client.git # git init --bare |
Now, we have initialized empty Git repository in /share/Public/git/webstore-client.git/
Now, let us go back to the project folder (webstore-client) and initialize the it as a git project.
|
1 2 3 4 5 6 7 |
root@sureshnas:/share/Public/git/webstore-client.git # cd .. root@sureshnas:/share/Public/git # cd webstore-client root@sureshnas:/share/Public/git/webstore-client # git init |
Add and commit the files to this local repository:
|
1 2 3 4 5 6 7 8 9 10 11 12 13 14 15 16 17 18 19 20 |
root@sureshnas:/share/Public/git/webstore-client # git add . root@sureshnas:/share/Public/git/webstore-client # git commit -m "initial commit" -a [master (root-commit) 525db8d] initial commit 12 files changed, 806 insertions(+) create mode 100755 .gitignore create mode 100755 pom.xml create mode 100755 src/main/java/com/testclient/AuthenticationClientServlet.java create mode 100755 src/main/java/com/testclient/Pan3dsClientServlet.java create mode 100755 src/main/java/com/testclient/RestCallClient1.java create mode 100755 src/main/webapp/WEB-INF/web.xml create mode 100755 src/main/webapp/login.html create mode 100755 src/main/webapp/pan3ds.html create mode 100755 src/main/webapp/payment_3ds.jsp create mode 100755 src/main/webapp/payment_3ds_token.jsp create mode 100755 src/main/webapp/payment_page.jsp create mode 100755 src/main/webapp/styles/webstore_client.css |
Now, let us take a step back to try and understand what we have done. We have created a webstore-client.git placeholder for the project. Then we have gone back to the project folder and marked it as a git project. As a next step we need to link this project’s contents with the webstore-client.git placeholder we created. That is done by adding a remote origin to the project. Use below command:
|
1 2 3 4 5 |
admin@sureshnas:/share/Public/git/webstore-client $ git remote add origin ssh://admin@192.168.1.103/share/Public/git/webstore-client.git |
Once we have added a remote origin, we can push the project contents to it. This will take the contents of the project folder and push it into webstore-client.git. Once this is done, you can log on to any client machine that has git client available and you will be able to clone the project contents. Push the project folder to git using below command:
|
1 2 3 4 5 6 7 8 9 10 11 12 13 14 |
admin@sureshnas:/share/Public/git/webstore-client $ git push origin master Password: Counting objects: 22, done. Delta compression using up to 4 threads. Compressing objects: 100% (17/17), done. Writing objects: 100% (22/22), 7.18 KiB | 0 bytes/s, done. Total 22 (delta 4), reused 0 (delta 0) To ssh://admin@192.168.1.103/share/Public/git/webstore-client.git * [new branch] master -> master admin@sureshnas:/share/Public/git/webstore-client $ |
That’s it. Now your project contents are available in the git server. Please note that the git contents are only available using SSH access. Below I will provide steps on how to clone the project from a windows machine. If you don’t have a Git client, you can install one for windows from here: https://gitforwindows.org/
The GIT GUI that comes along with the Git client is very handy. After installation of GIT on window, right click in the folder of your choice and choose GIT GUI here and the choose “Clone Existing Repository”:
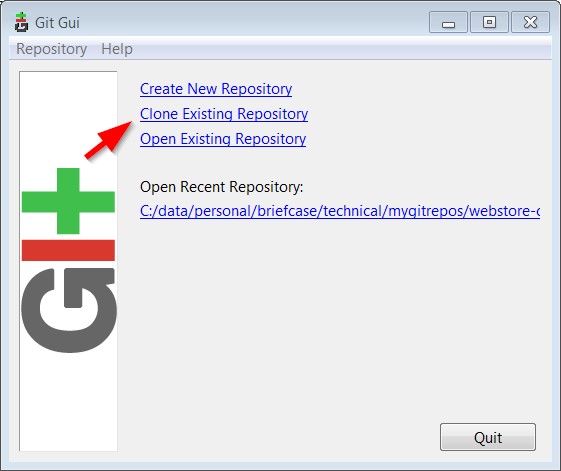
Provide the source location as the SSH location of your NAS. For my repo, I used the location I had created on my NAS server:
|
1 2 3 4 5 |
ssh://admin@192.168.1.103/share/Public/git/webstore-client.git |
Target directory can be any directory of your choice were you want to clone your projects:

Click the clone button. When prompted for password provide your root/admin password of the NAS. It could take a bit of time as your client machine connects to NAS and negotiates the handshake. If prompted with a warning that the server is unknown and if you would like to connect, you can override with “Yes” for the answer. Then provide the admin/root password when prompted for the same as below:
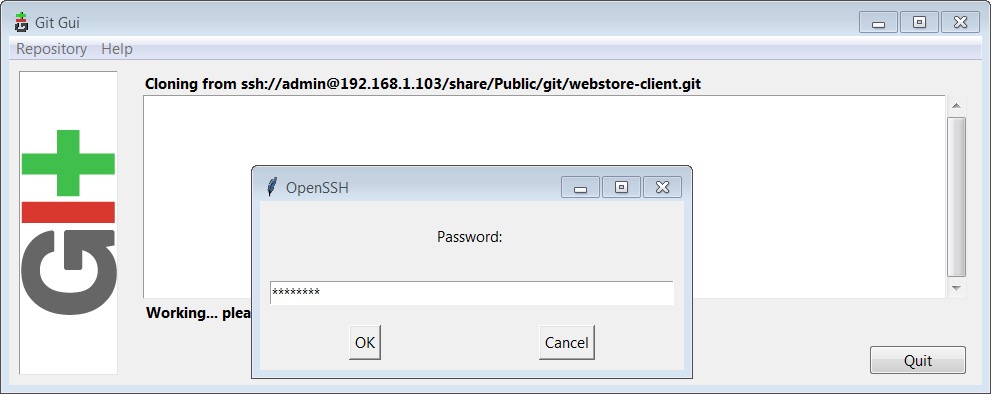
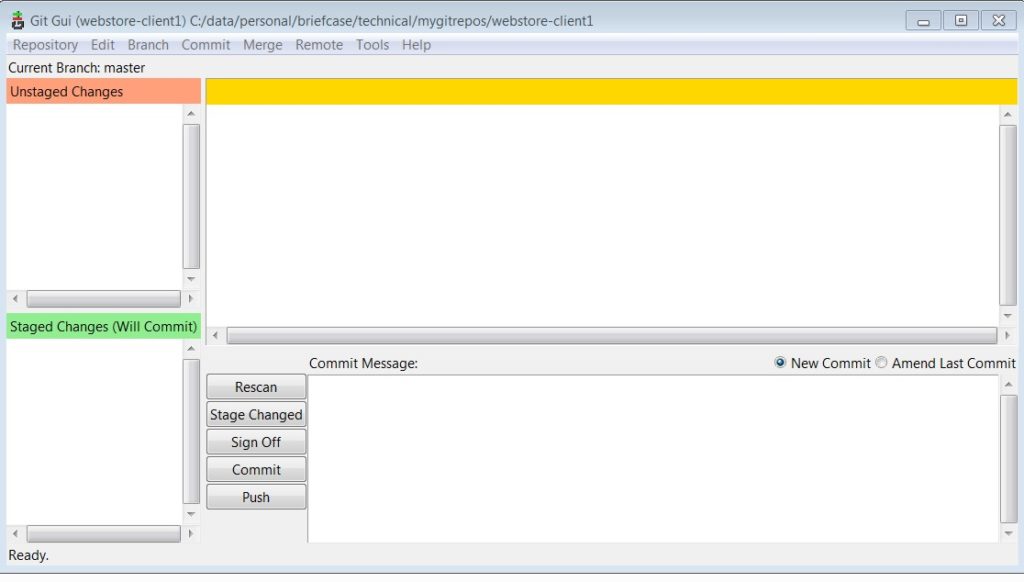
That’s it. Your repository should be cloned and the gui should display as below:
During the process, if you are prompted with below warning – respond with yes.

The remote repository is now cloned to your client. You can make changes, commit and push the changes. The changes are stored on your own NAS server. You can revert, view and audit all your changes and enjoy the freedom a version control system provides to a developer. Happy Programming!